CueQueue interoperates with Ableton Live to create a powerful environment for live music playback. Now you can use the power of Ableton's timeline in Arrange Mode with the simplicity of a cuelist interface.
In CueQueue, each locator becomes a seperate cue in a cuelist. This enables you to lay out your entire in one session, providing all the power of Arrange view with the simplicity and robustness of a show control cuelist. With the use of CueQueue commands in the names of locators, CueQueue can control Ableton Live, allowing for flexible and non-linear playback including stopping, vamping, jumping, non-linear MIDI output, OSC control, shell command execution, and even branching logic.
CueQueue is quickly becoming the best way to give your live musicians an excellent experience in playback integration, having already been used in professional theatre on:
CueQueue is available for Mac and for Windows by special arrangement.
No, CueQueue is not affiliated at all with Ableton or Live, but is interoperable. CueQueue is made by Picardy Fourth LLC, a very small music technology company.
CueQueue runs as a control surface within Ableton, establishing a link between CueQueue and Ableton over a virtual MIDI bus. CueQueue and Ableton communicate over this virtual MIDI bus, allowing them to stay in sync and pass messages between each other.
CueQueue is extremely reliable and performs flawlessly even under heavy CPU load. Firing a cue is as about as immediate as playing a note into an instrument in Ableton, and is roughly the same as the delay from the buffer size set in Ableton's audio settings. Navigating locators takes slightly longer, but it is still extremely fast. The exception is locator commands which can take around 50ms to execute, depending on the command, but this does not affect playback.
Session view, while great for non-linear playback, has many limitations for the use of a theatre show, such as not being able to change the tempo, not having granularity with muting or automation. There are workarounds for this, used in some professional theatre productions, but they are nowhere near as robust or as convenient as CueQueue.
Yes, CueQueue can both send and receive OSC. For any of its assignable functions, CueQueue is able to receive basic OSC to trigger these functions as well. CueQueue can also send OSC on a "GO" or when the playhead passes a locator. For MIDI, note on, note off and control change messages can trigger any of the assignable functions and can also similarly be triggered on a "GO" or when the playhead passes a locator/
CueQueue's data is saved transparently into your live set, so make sure you save your changes, but it will otherwise not affect your Live Set.
CueQueue is cross-platform and a Windows version does exist. While it has been used professionally on this platform, it is not yet ready for general release. Please send me an email for further information.
Yes, email me.
CueQueue is a one-man project written entirely by me in my spare time. I’d love to hear from you if you have suggestions for improvement.
Like many Mac apps, CueQueue comes as a .dmg file. Open the dmg file, read and agree to the End-User License Agreement and drag the CueQueue app to the Applications folder to install it.
You may now launch CueQueue. Before CueQueue runs for the first time, it will ask you to install the control surface driver into your Ableton installation(s). This is necessary for Ableton to communicate with CueQueue. Click the "Install" button to install the driver. If Live is open, CueQueue will prompt you to close it in order to install the driver.

Once this is done, click "OK". You can now open Ableton Live. Under Live → Preferences → Link/MIDI, select CueQueue as one of the MIDI control surfaces. Select "CueQueue" as the Input and Output. If you wish to use the MIDI out capabilities of CueQueue, turn the Remote switch to on for the "CueQueue Midi Out" input.

CueQueue should now connect to Ableton Live. You must keep Ableton Live visible at all times when working in CueQueue, otherwise you will risk disconnection. Add a locator into your project to confirm that CueQueue updates instantly.

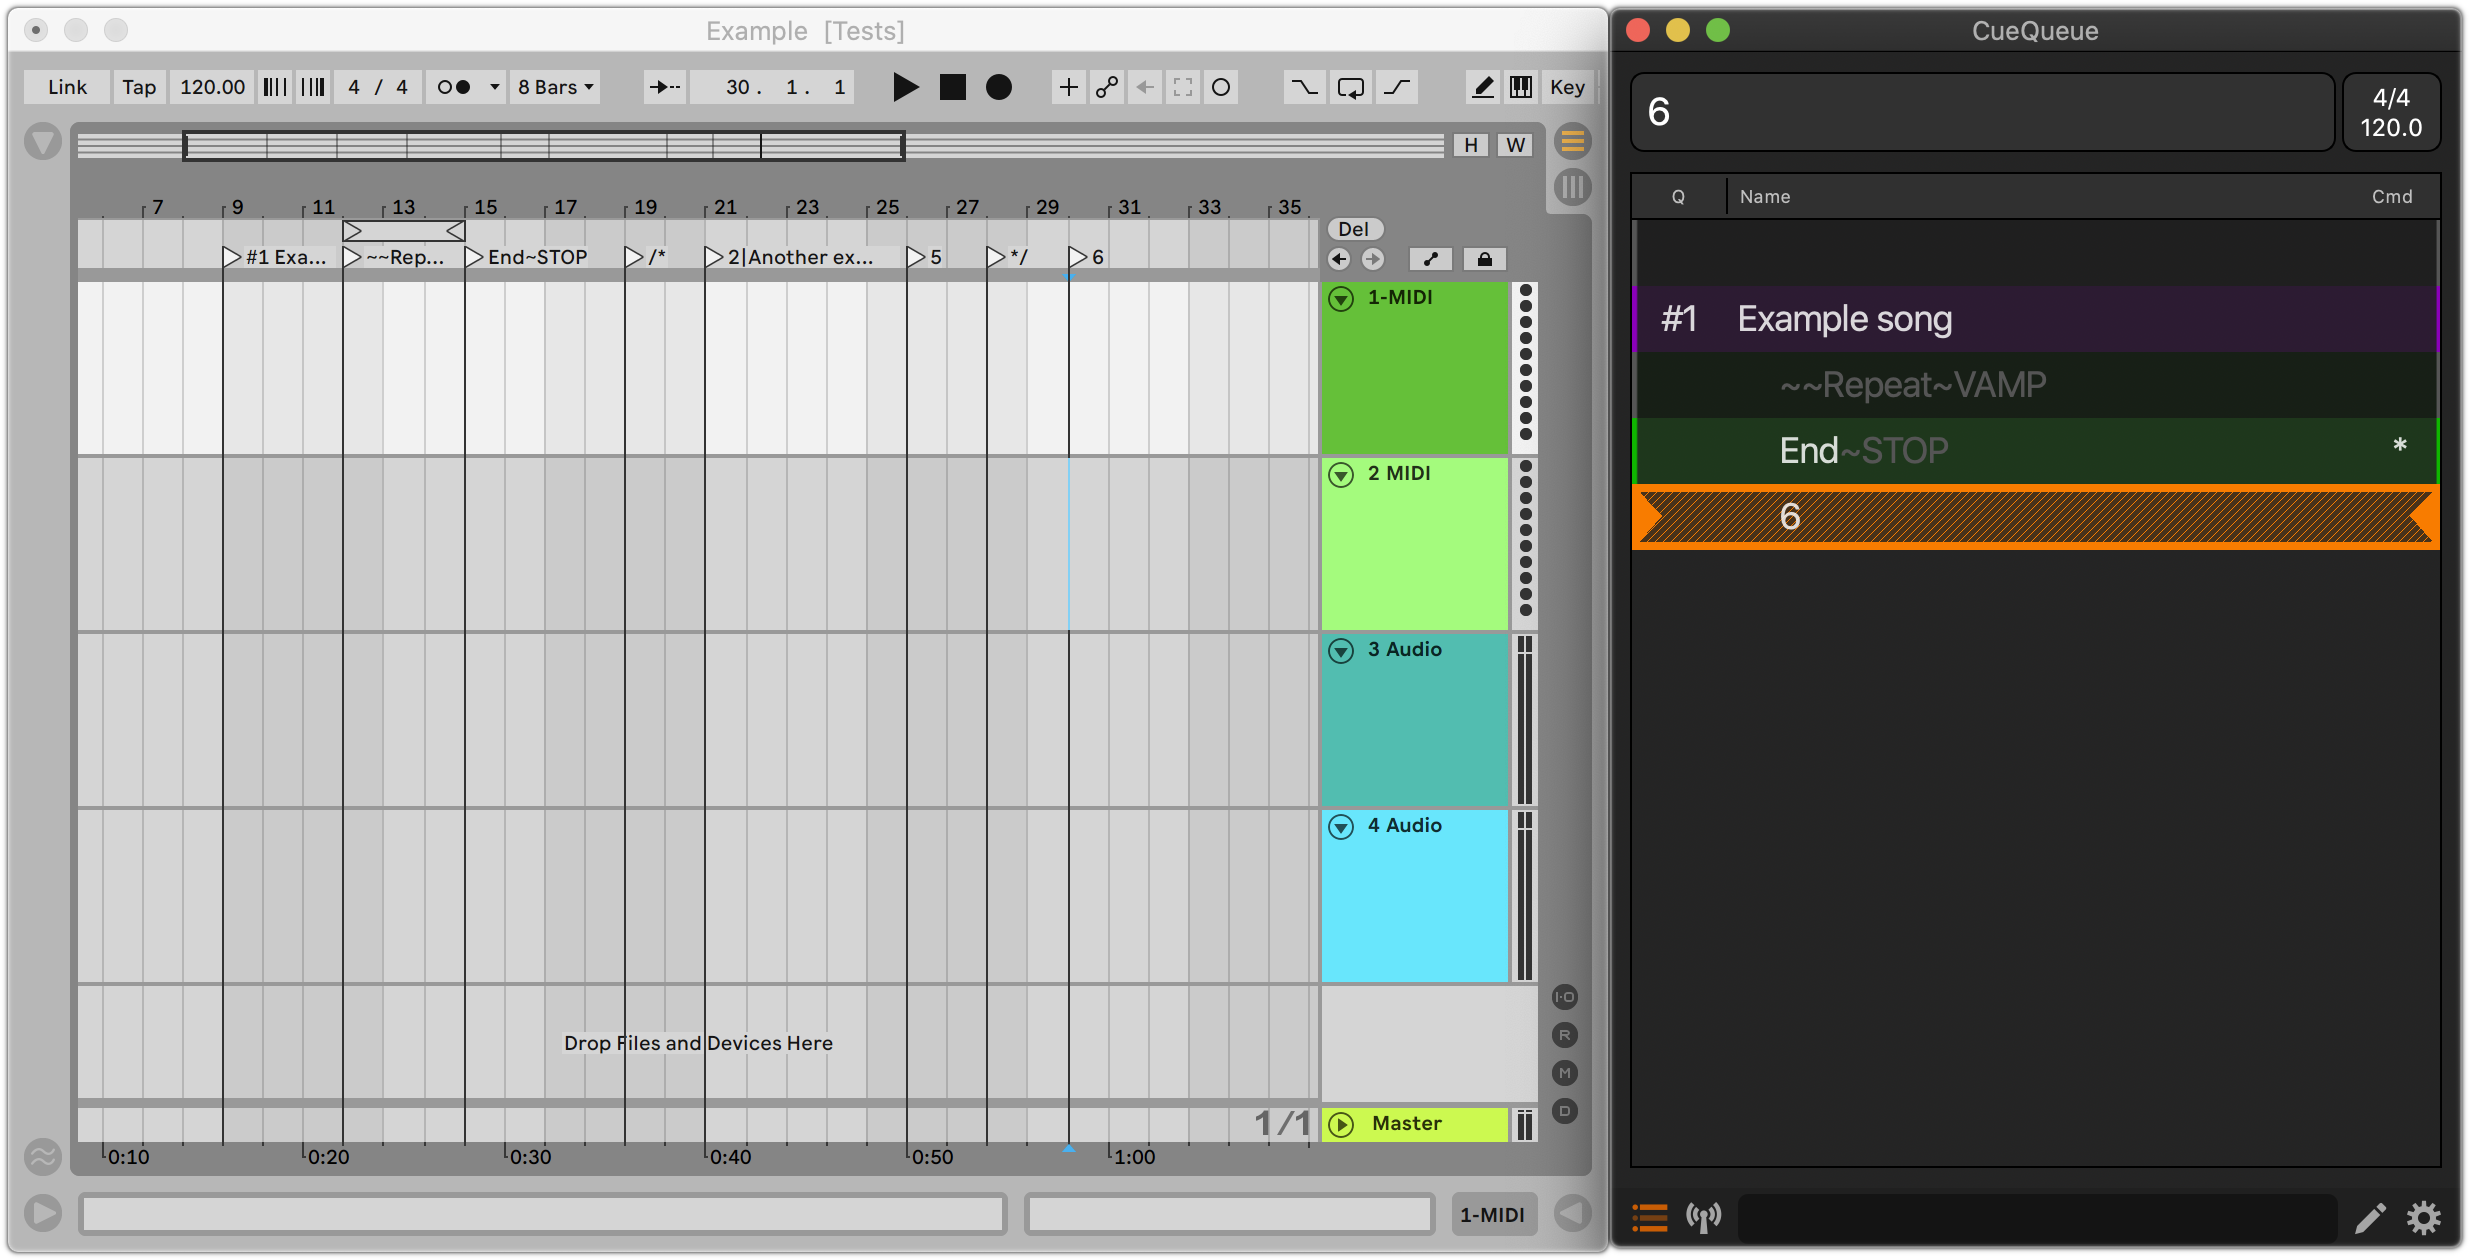
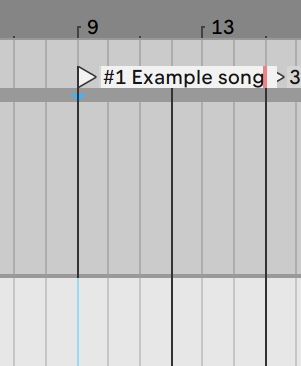
In Ableton add three locators fairly close together on the timeline. They will appear in CueQueue instantly. Now, within CueQueue, use the UP and DOWN arrow keys. As you navigate between these three locators, you can see Live's play cursor jump to the locator. triangles on the left and right of the cuelist denote Live's position. CueQueue's header also updates to reinforce which locator Ableton is within. Live's playhead it follows your selection almost immediately.
Navigate to the first locator and press SPACEBAR. Ableton plays the selected cue, and CueQueue's display turns green to show that it is playing. CueQueue's header is animated in green in time with the tempo of the Live Set at the playhead. Allow the playback to pass the second and third locator, and notice how CueQueue's interface follows..
Notice that playback will continue indefinitely. Once playback has reached the third locator, press ESCAPE. CueQueue's header briefly flashes red and playback is stopped. This is the basic operation of CueQueue — controlling Ableton's playback and updating its interface based on it.
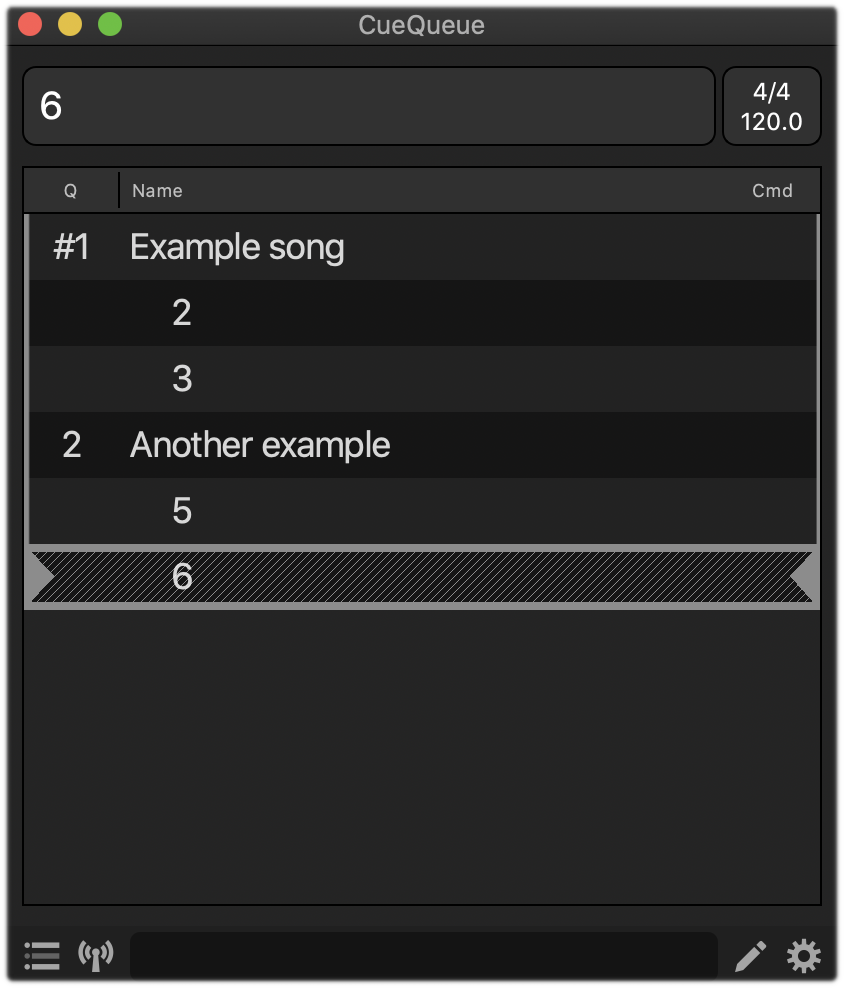
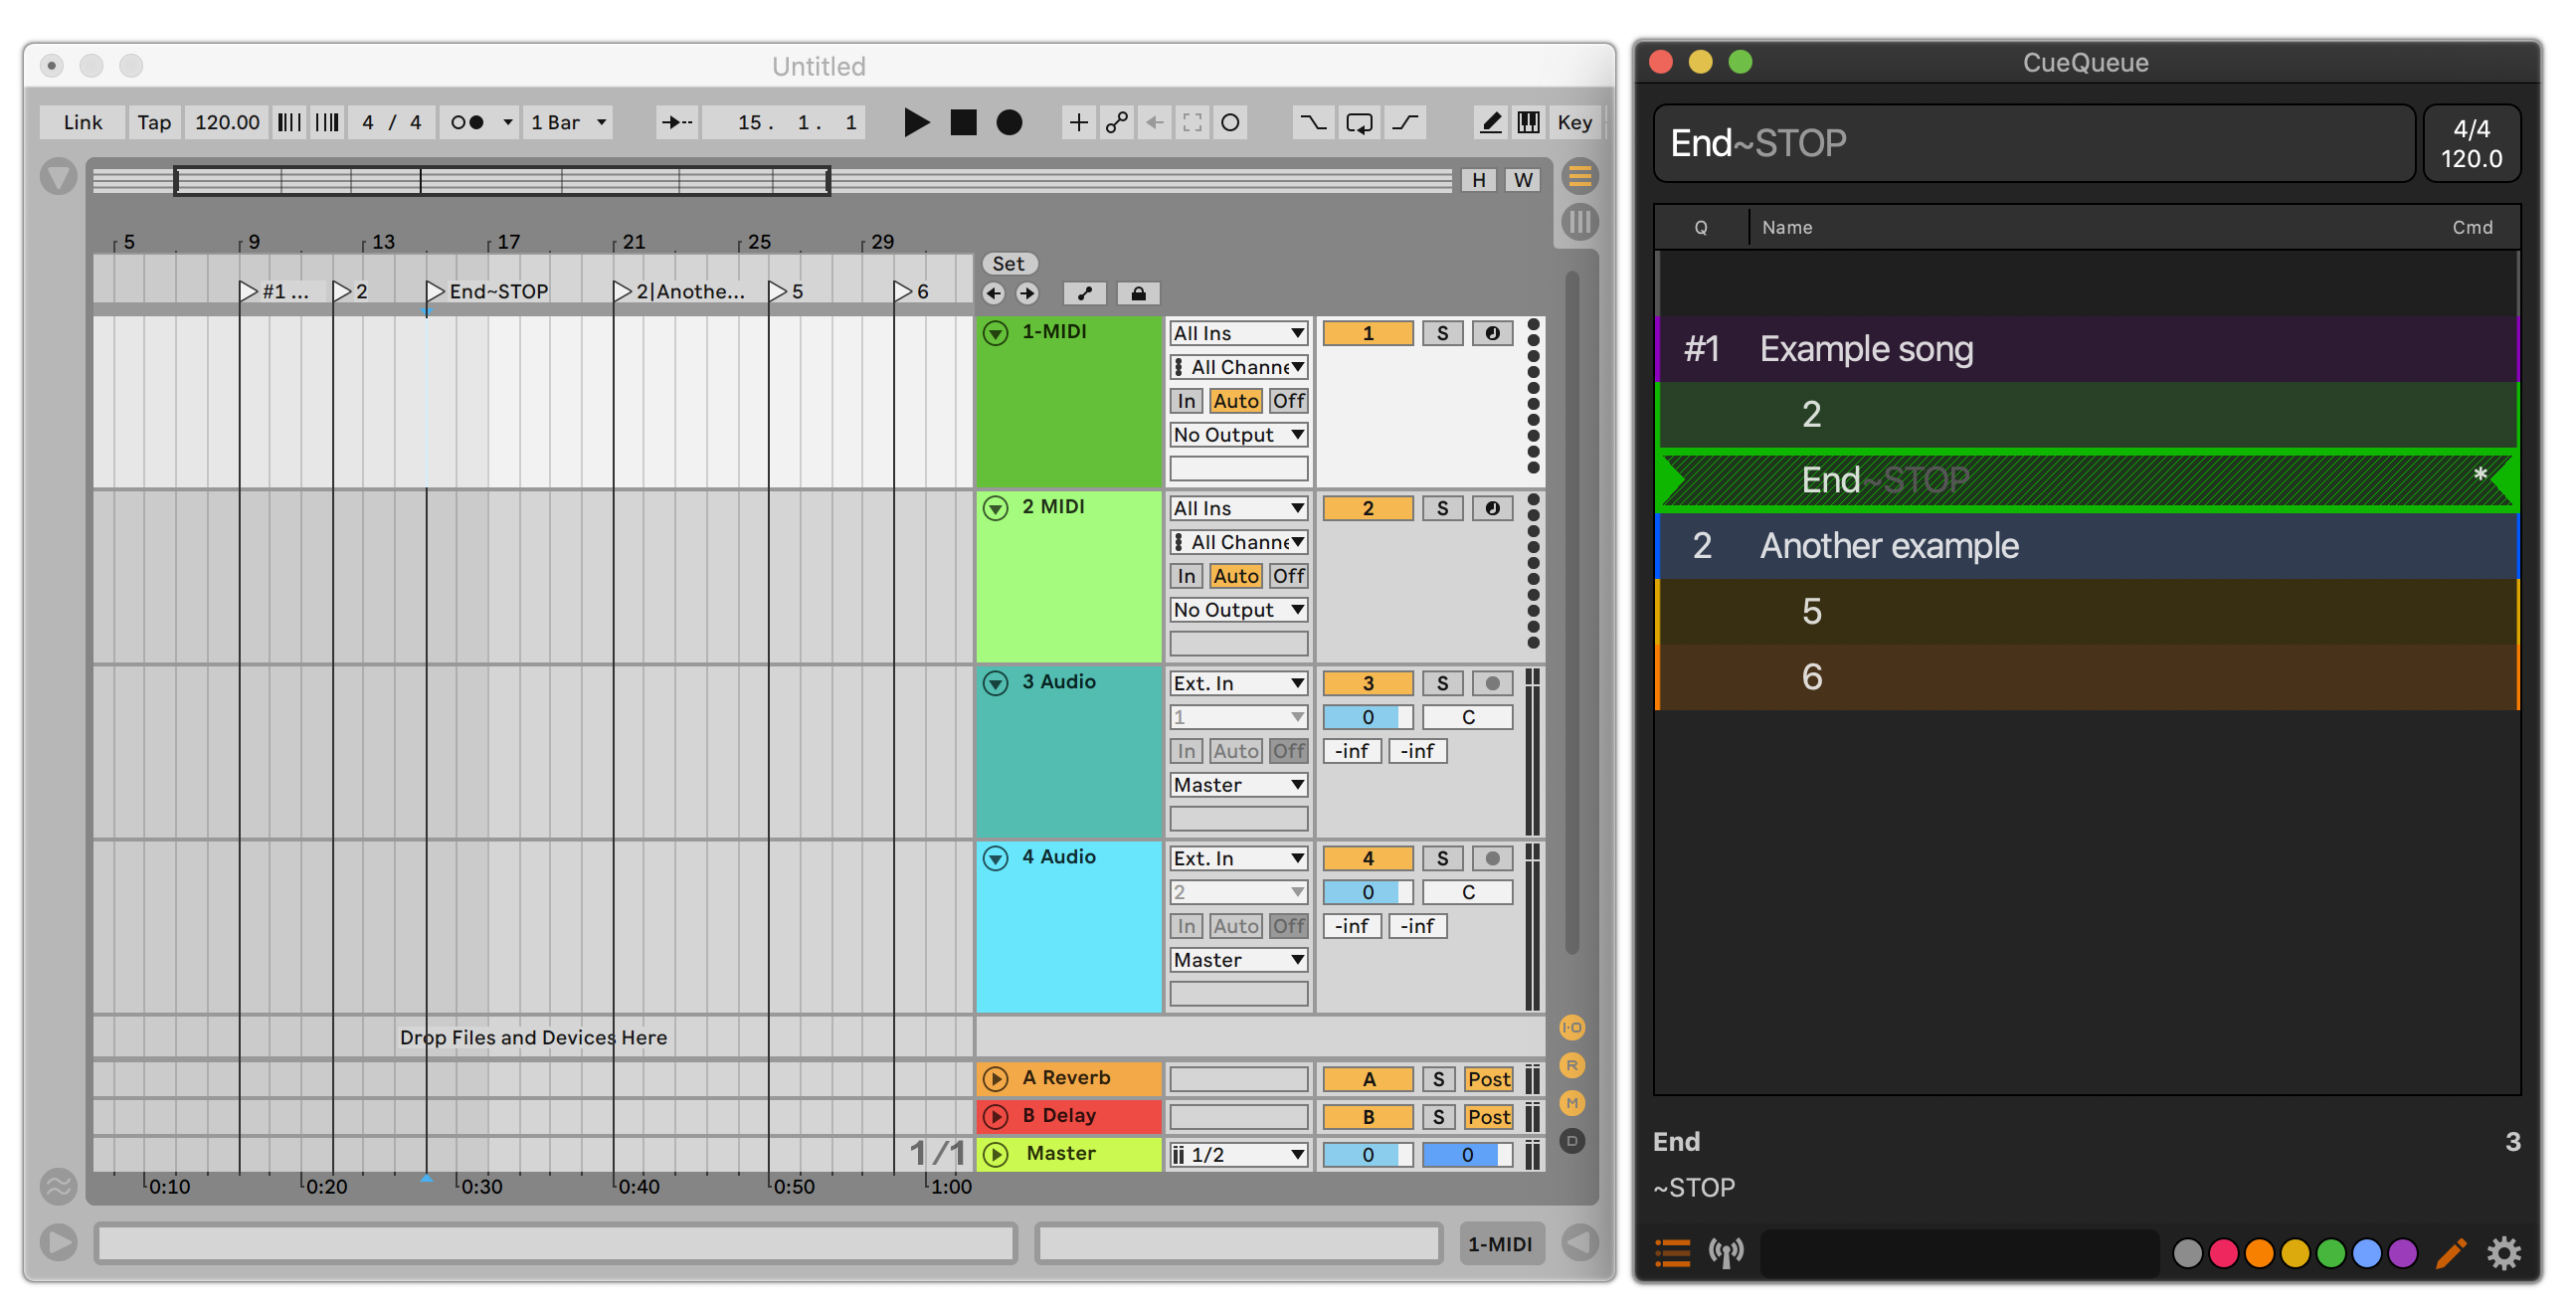
Notice that the "Q" column in CueQueue is empty. To utilize this, we can name our locators using cue prefixes. Cues with prefixes are known as parent cues. There are two ways to create a parent cue with prefix:
To see this in action, in Ableton Live, rename the first locator to "#1 Example song." By default, rename in Ableton is Cmd + R (Mac) or Ctrl + R (Windows). Notice that now, CueQueue uses the Q column, and the second and third cues are indented. This allows for you to organise your hierachly organise your sets.
Create a fourth locator after the third locator, and two more just for fun. Rename the fourth locator to "2|Another example." If you are unfamiliar with the pipe key, it is usually created by pressing Shift+\ . This time, anything before the pipe key (|) becomes part of the cue prefix in the CueQueue window. Now, you can use the LEFT and RIGHT arrow keys to move between the parent cues.
Select the pencil icon in the bottom right corner or hit "E". A small color palette appears. Click on a color to assign it to your current cue. You may also use the number keys 0-5. Colors are saved into the Live Set, so be sure you save your work if you want them to be recalled.

Well this is all good and well to be pretty colors and names for locators, but how on earth does this help me create an effective show?
Read on, we're about to go deep.
CueQueue has a dictionary of commands that allows you to control Ableton and extend its functionality. All commands are written into the name locator to which they apply and start with a tilde (~). Any arguments are seperated by a space. There can be multiple commands per marker, which will be executed sequentially.
Commands are not visible in CueQueue except when the Edit button is toggled, where they show in the lower pane, or when "Show hidden cues" (the bottom left icon) is active. Cues without a name before the first command will be invisibile without this option on. This allows you to seperate the logic and commands in your set to the operator's perspective.
Now rename the third locator to "End~STOP". If you cannot find the tilde (~) key, it is usually
Shift+`, the key immediately to the left of "1". Notice that the ~STOP part of the name
does not show in CueQueue. Click the bottom left icon (Show hidden cues) and notice that ~STOP is now visible.
Using CueQueue, hit SPACEBAR while the second locator is selected and playback will stop shortly after
arriving at the "End" marker. The playhead in CueQueue however, is ready to play the next locator.
Many commands have a shorter nickname, you may use these instead of the full name when you're comfortable doing so. To see this, rename the third locator to "End~Z". The behaviour for this cue will be the same.
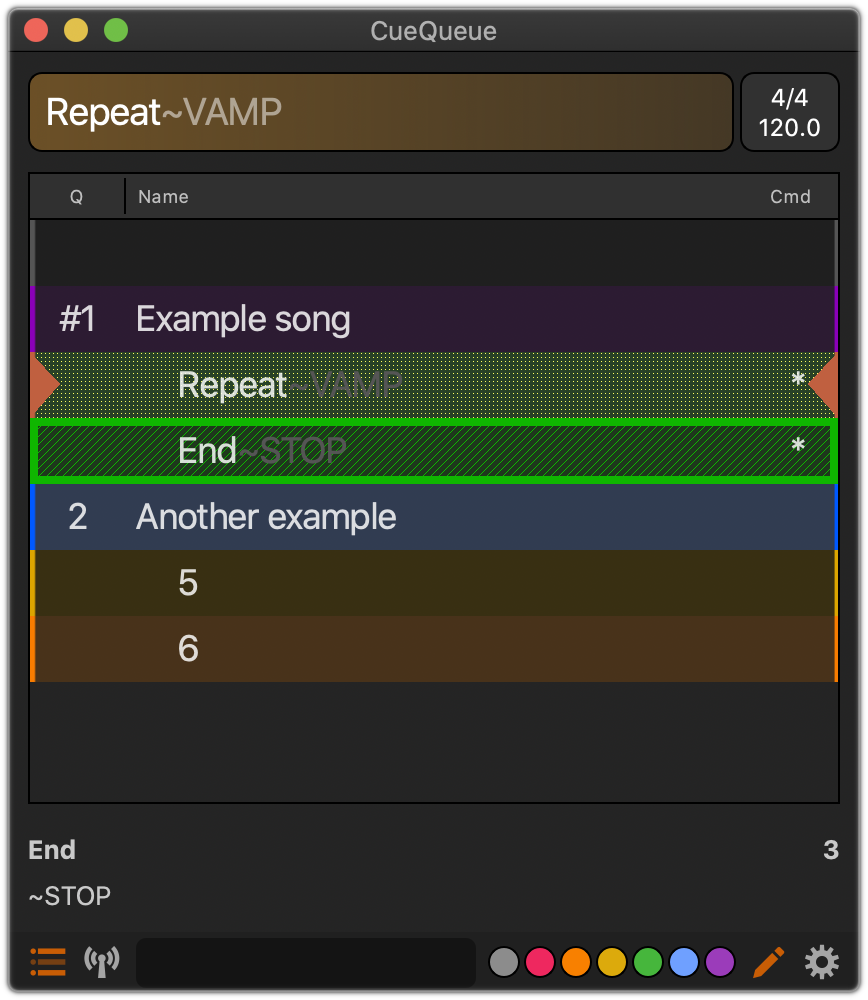
Another useful command is ~VAMP, which creates a looped region. Rename the second cue "Repeat~VAMP", and then fire the first cue in CueQueue with SPACEBAR to see this effect. As the playback passes the newly named cue, CueQueue will add in a repeat region in Live around the ~VAMP locator and the next locator. CueQueue's playhead will remain at the next cue, so that the operator can leave the vamp.
By default, Ableton has a 1-bar launch quantize. Fire this the third cue "End" while Ableton vamps. You'll notice that the header turns orange briefly, before jumping to the cue and stopping. This denotes that CueQueue is waiting for Live's launch quantize.
~JUMP takes the name of the cue to jump to as an argument. For simplicity and readability, you are permitted to enter a partial name, such as just the prefix. If there are multiple cues with this name, ~JUMP will jump to the closest one in time.
Let's make the final marker return to the first. Rename the final marker "Return to start~JUMP #1". The words "Return to start" appear in the cue list. In CueQueue, fire this cue with SPACEBAR and you'll see that immediately CueQueue displays an orange quantize display in the header, waiting to jump. After a bar, it jumps to the marker.
How to jump immediately? Try renaming the final marker "Return to start~STOP~JUMP #1". This will stop the playback before the jump, and jump in the stopped state. Now try "Return to start~STOP~JUMP #1~PLAY". This will restart playback immediately after the jump.
You may hide any cue by typing "~~" before the locator name. This will allow it to show in the "Show hidden cues" mode. You may completely ignore a locator by proceeding the name with "//". You may hide a group cues by putting a locator named "/*" before the group to hide, and a locator named "*/" after the group to hide. Users familiar with C, C++ and Javascript will be familiar with this syntax. Try these out!